
Contents
- 1.
- 1.1. What Is a Garment Spec Sheet and How Is It Different From a Tech Pack?
- 1.2. The 6 Key Sections of a Garment Spec Sheet
- 1.3. How to Measure Against a Spec Sheet — Practical Process
- 1.4. How to Identify Errors and Raise Queries
- 1.5. Spec Sheet Approval — Who Signs Off and When
- 1.6. Common Spec Sheet Reading Mistakes
- 1.7. FAQ
A spec sheet with a measurement that’s 2cm off doesn’t announce itself — it just quietly produces a garment that doesn’t fit right, unless someone actually knows how to read the sheet properly and catch the error before cutting starts. Reading a spec sheet correctly is a skill, not a formality.
This guide covers how to read a garment spec sheet UK brand owners, buyers, and production assistants need, whether the sheet was written by your own team or supplied by a manufacturer.
In this article:
- What a spec sheet is and how it differs from a tech pack
- The 6 key sections every spec sheet contains
- How to measure a garment against its spec sheet
- How to identify errors and raise queries properly
- Who approves a spec sheet, and when
- The reading mistakes that let errors through
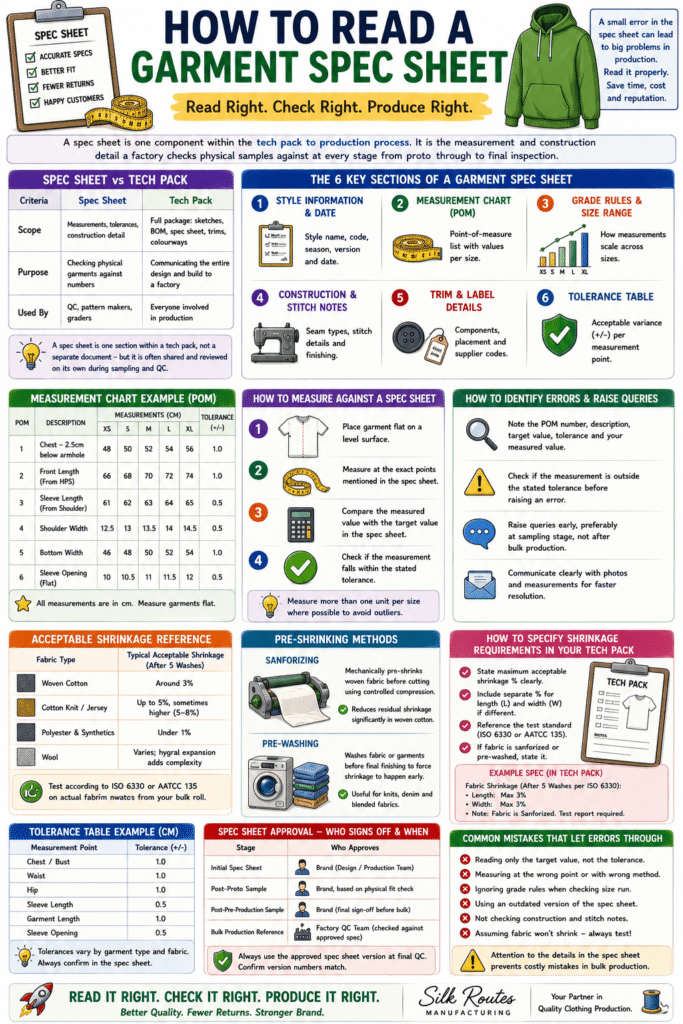
A spec sheet is one component within the tech pack to production process — it’s the measurement and construction detail a factory checks physical samples against at every stage from proto through to final inspection.
What Is a Garment Spec Sheet and How Is It Different From a Tech Pack?
| Spec Sheet | Tech Pack | |
|---|---|---|
| Scope | Measurements, tolerances, construction detail | Full package: sketches, BOM, spec sheet, trims, colourways |
| Purpose | Checking physical garments against numbers | Communicating the entire design and build to a factory |
| Used By | QC, pattern makers, graders | Everyone involved in production |
A spec sheet is one section within a tech pack, not a separate document — but it’s also often shared and reviewed on its own, particularly during sampling and QC, which is why understanding it in isolation matters.
The 6 Key Sections of a Garment Spec Sheet
| Section | What It Contains |
|---|---|
| Style Information and Date | Style name, code, season, version |
| Measurement Chart (POM) | Point-of-measure list with values per size |
| Grade Rules and Size Range | How measurements scale across sizes |
| Construction and Stitch Notes | Seam types, stitch details, finishing |
| Trim and Label Details | Components, placement, supplier codes |
| Tolerance Table | Acceptable variance per measurement point |
Style Information and Date
This section identifies exactly which style and version you’re looking at — critical when a garment has gone through multiple revisions, since an outdated spec sheet in circulation is a common source of confusion.
Measurement Chart and Points of Measure (POM)
The measurement chart lists every point of measure — chest, waist, sleeve length, and so on — with a target value for each size. Each POM should be measured at a consistent, defined location on the garment, not an approximate area, or comparisons between the spec and a physical sample won’t be reliable.
Grade Rules and Size Range
Grade rules show how each measurement point changes between sizes — the increment applied at the chest for each size up, for example. Reading grade rules tells you whether a garment has been graded consistently, or whether one size in the range looks like an outlier.
Construction and Stitch Notes
This section specifies seam types, stitch details, and finishing requirements for the garment. It’s the section most often skimmed past, even though it directly affects whether a factory builds the garment the way it was actually designed.
Trim and Label Details
Trim details list every component — zips, buttons, labels — often with supplier codes and placement instructions. Cross-checking this section against a physical sample is one of the fastest ways to catch a substituted or incorrect trim.
Tolerance Table
The tolerance table states how much variance is acceptable at each measurement point, usually as a plus-or-minus figure. Without checking this table, a measurement that’s technically outside spec can be mistakenly treated as “close enough.”
How to Measure Against a Spec Sheet — Practical Process
Measure the garment flat, at the exact point described in the spec sheet, using consistent technique every time — small differences in how a measurement is taken can produce different results even on the same garment. Compare the measured value against the target and check it falls within the stated tolerance, not just “close to” the target number.
Measure more than one unit per size where possible, since a single garment can be an outlier rather than representative of the whole batch. If you’re checking a batch against a spec sheet for the first time, our clothing manufacturing services team can walk through the process with you.
How to Identify Errors and Raise Queries
Flag a discrepancy with the specific measurement point, the target value, the tolerance, and the actual measured value — vague feedback like “this doesn’t look right” slows down resolution considerably. Check whether the discrepancy falls outside the stated tolerance before raising it as an error; a measurement within tolerance isn’t a defect, even if it isn’t exactly on target.
Raise queries early, ideally at the sampling stage rather than after bulk production, since a spec sheet error caught early costs far less to correct.
Spec Sheet Approval — Who Signs Off and When
| Stage | Who Approves |
|---|---|
| Initial Spec Sheet | Brand (design/production team) |
| Post-Proto Sample | Brand, based on physical fit check |
| Post-Pre-Production Sample | Brand (final sign-off before bulk) |
| Bulk Production Reference | Factory QC team, checked against approved spec |
The spec sheet used at final QC should be the exact version approved after the pre-production sample — not an earlier draft. Confirm version numbers match between what’s on file and what the factory is actually checking against.
Common Spec Sheet Reading Mistakes
Treating any deviation as an error, regardless of tolerance. A measurement slightly off target but within tolerance isn’t a defect. Fix: always check the tolerance table before flagging a measurement as wrong.
Comparing against an outdated spec sheet version. Revisions happen, and an old version can circulate alongside the current one. Fix: confirm you’re working from the latest approved version before measuring anything.
Measuring inconsistently between garments. Different measuring technique on different units produces unreliable comparisons. Fix: use the same measuring method and point on every unit checked.
Skimming construction notes because they’re not numeric. Construction detail is as binding as the measurement chart, even though it’s harder to verify at a glance. Fix: check construction notes against the physical sample as carefully as the measurements.
Not checking grade rules across the full size range. A spec sheet can look correct at the sample size while one size elsewhere in the range is clearly wrong. Fix: spot-check grade rules at the smallest and largest sizes, not just the sample size.
FAQ
What is the difference between a spec sheet and a tech pack?
A spec sheet is one section within a tech pack, focused specifically on measurements, tolerances, and construction detail. A tech pack is the complete package, including sketches, Bill of Materials, colourways, and the spec sheet together.
What does POM mean on a garment spec sheet?
POM stands for Point of Measure, referring to a specific location on a garment — such as chest width or sleeve length — where a measurement is taken and checked against a target value and tolerance.
How do I know if a measurement is actually wrong?
Check the measured value against both the target figure and the stated tolerance range, not just whether it looks close. A measurement outside the tolerance is a genuine discrepancy; one within tolerance, even if not exact, is acceptable.
Who is responsible for approving a garment spec sheet?
The brand typically approves the initial spec sheet and signs off again after the pre-production sample, which becomes the final reference for bulk production. The factory’s QC team then checks bulk output against that approved version.
What should I do if I find an error on a spec sheet?
Raise the specific measurement point, target value, tolerance, and actual discrepancy clearly, ideally during sampling rather than after bulk production has started. Catching and correcting an error early is significantly cheaper than fixing it once a full batch has already been produced.